


Create and Manage Survey Branches
You can create multiple branches of the survey to collect responses in different way or from different groups of people.
This will also help in filtering and analyzing survey results by branches.
Step 1 : From page header, Click on "My Surveys" tab

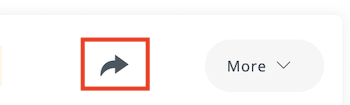
Step 2 : Click on share icon next to the survey
Step 3 : To create a new branch, click on "Create New Branch" then enter the branch details and save
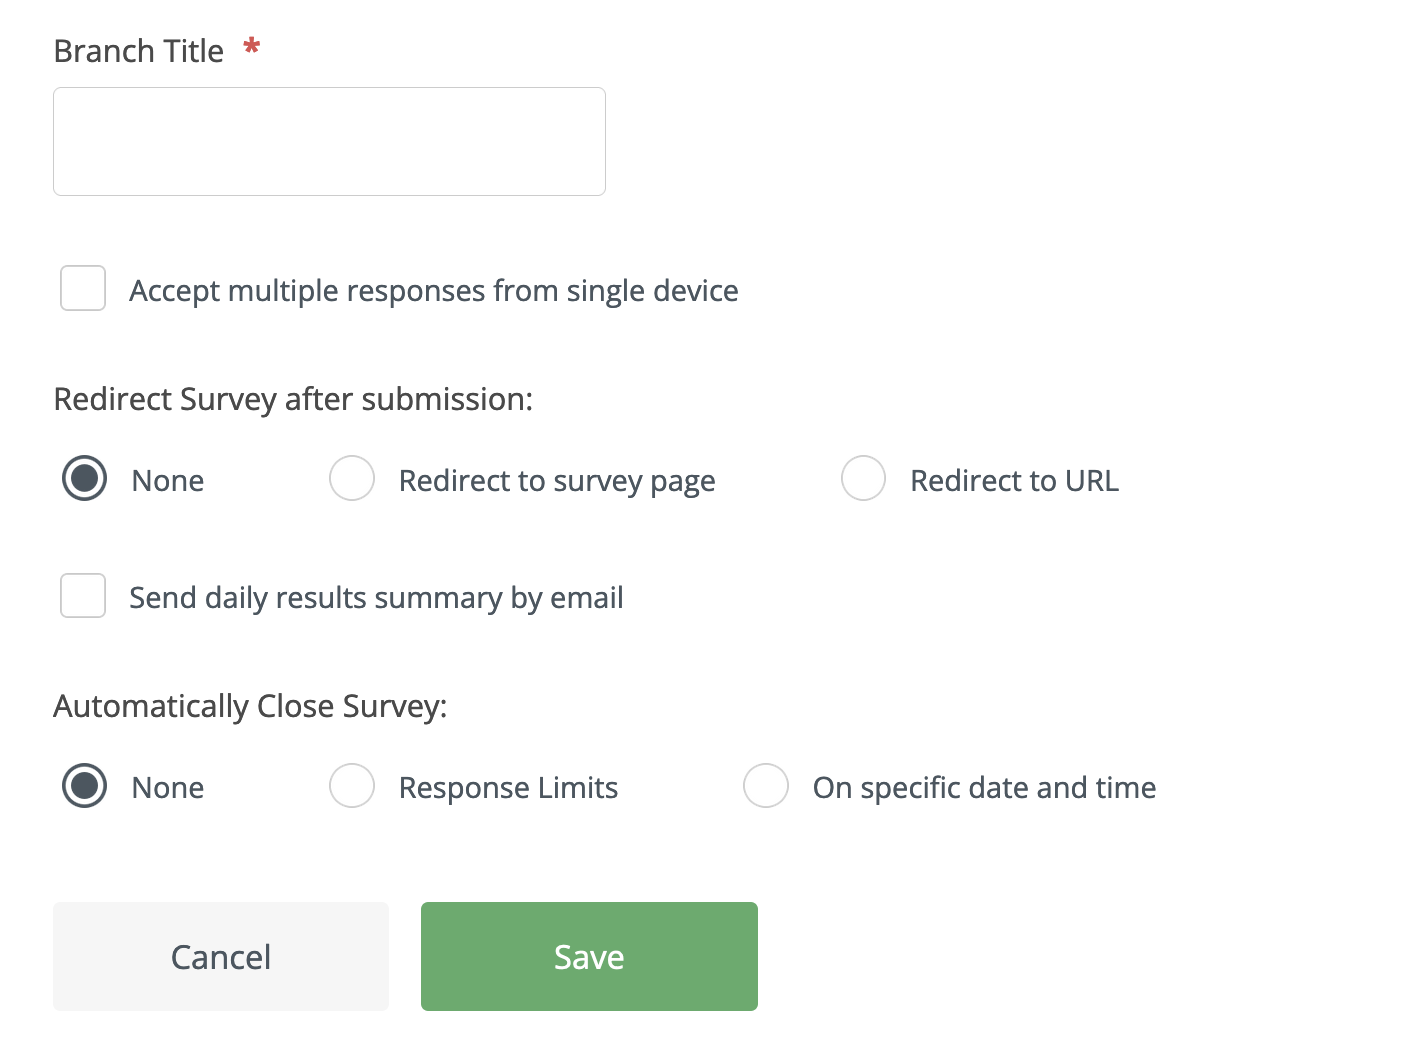
- Enter branch title
- Check if you would like to "Accept multiple responses from single device" (Optional)
- Choose where to redirect the respondent after survey completion (Optional)
- Select if you like to receive daily results summary by email (Optional)
- Choose if you like to automatically close the survey at specific date/time or after collecting specific number of responses (Optional)
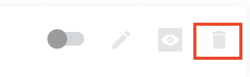
To edit branch details and options, click on edit icon next to the branch

To activate/deactivate survey branch, switch ON/OFF the activation button

To delete a branch, click on delete icon next to the branch
Create Survey Now